
How to prepare an apartment for 3D tour photography: a checklist of 12 items
Preparing the apartment for a 3D tour directly affects the quality of the final tour. The Matterport Pro3 scanner captures literally everything — from dust on a shelf to a stray wire under the TV. Go through this checklist a day before shooting, and the tour will turn out clean, spacious and appealing.
Step 1: General cleaning
Wipe dust from all surfaces: windowsills, shelves, kitchen cabinets. Wash mirrors and glass surfaces — they appear in every panorama. Vacuum carpets and baseboards. 3D tour scanning takes 1–3 hours, and during all this time the scanner "sees" every centimeter.
Step 2: Remove personal items and documents
Family photos, children's drawings on the refrigerator, personal documents, medications — all of this reduces the neutrality of the space and distracts potential buyers. Put them in drawers or cabinets. Exception — beautiful decorative items that add coziness: vases, books, plants.
Step 3: Maximum natural lighting
Open all curtains and blinds. Matterport Pro3 shoots in HDR, and the more natural light — the more voluminous and attractive the rooms look. If the windows face north or the tour is planned for the evening, add portable lamps with neutral white light (4000–5000 K).
Step 4: Turn on all electric lighting
Turn on chandeliers, wall sconces, under-cabinet lighting, LED strips — each light source adds depth to the image. Check that no bulbs are burnt out. Dark corners in a 3D tour look like 'holes' in the space.
Step 5: Hide Cables and Equipment
Remove charging cables, extension cords, and TV/computer cables behind furniture or bundle them with cable ties. If the system unit, printer, or other bulky equipment are not part of the interior design — store them in a closet during filming.
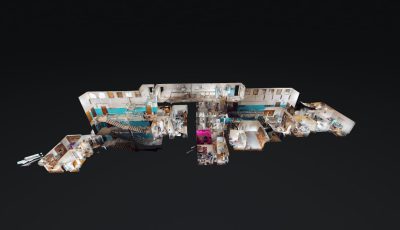
Step 6: Clear the passages between rooms
For complete scanning, the scanner must be positioned at multiple points in each room. Cluttered passages create 'blind spots' — unscanned areas that will appear as gray patches in the tour. Passage width — minimum 60–70 cm.
Step 7: Prepare bathrooms
Close the toilet lids — an open lid in the 3D tour looks unkempt. Remove personal hygiene products (shampoos, toothbrushes). Hang fresh towels, put decorative soap. A clean mirror in the bathroom is a must.
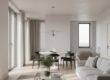
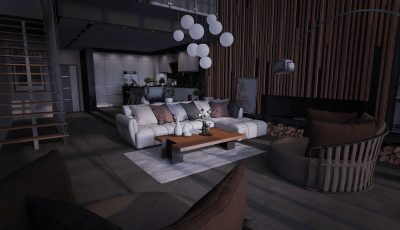
Step 8: Arrange décor and fresh flowers
Small details make the space 'alive': a vase with flowers on the dining table, a couple of decorative pillows on the sofa, a beautiful book on the coffee table. Don't overload — 2–3 accent elements per room is enough.
Step 9: Check the Balcony and Loggia
Balconies often turn into storage. A day before filming, remove everything unnecessary from it, wipe the floor and railings. An open, neat balcony adds a sense of space and is perceived as a bonus to the area.
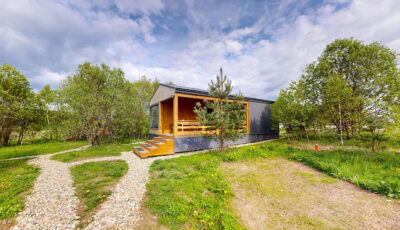
Step 10: Remove the Vehicle from the Yard (if Filming with Facade)
If the tour includes shooting of the facade or entrance group — remove the car from the parking lot in front of the house. Other people's cars block the view and "clutter" the facade panoramas. Arrange with neighbors in advance if needed.
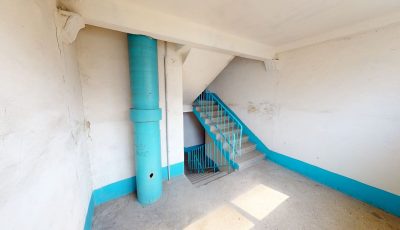
Step 11: Tidy up the entrance group
Scanning begins at the entrance door. A clean mat, neatly arranged shoes on the shelf (no more than 2–3 pairs), a mirror without streaks — the first seconds of the tour shape the impression of the entire property. What the buyer sees at the beginning of the virtual tour, they will remember the most.
Step 12: Final walkthrough 30 minutes before shooting
Walk through the apartment one more time right before the 360° Space specialist arrives: turn on all the lights, remove any items left lying around (keys, glasses, shopping bags), air out and close the windows. These 30 minutes are your insurance against small details that would be impossible to fix later.

Common mistakes when preparing for filming
- Leave personal belongings in plain sight — the buyer purchases space, not someone else's lifestyle
- Unable to check lighting — a burnt-out light bulb or closed curtains kill the frame depth
- Clutter the passages — the scanner won't be able to reach all corners, blind spots will appear
- Forget about the balcony and bathrooms — these zones are often the most unprepared
Order a 3D tour for your property
Leave your contact — we'll respond within 30 minutes and calculate the cost